


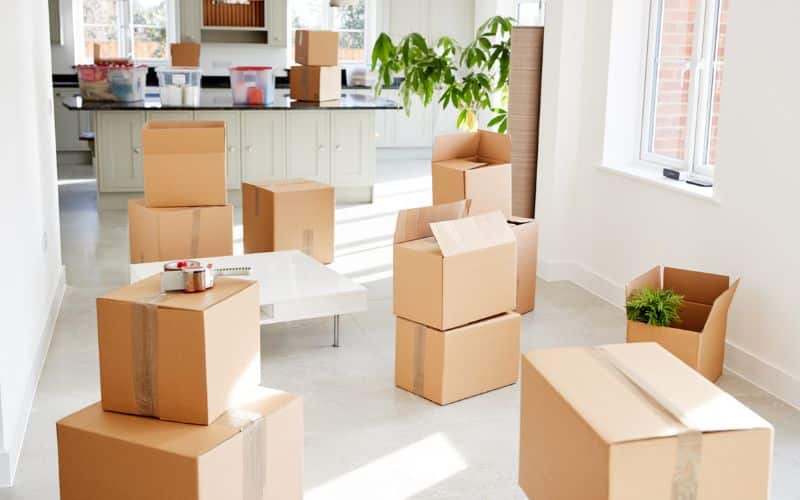
Moving out can be a whirlwind of activity, but amidst the packing and planning, there’s one crucial task you can’t overlook: the final clean. To ensure you leave your space spotless and secure that all-important deposit, you’ll need an exhaustive cleaning list tailored for moving out. In this article, we’ll guide you through the essential cleaning steps room by room, so you can tick off every box and move out with ease and confidence. Whether it’s scrubbing the oven or dusting the skirting boards, we’ve got you covered with practical tips and tricks to make your move-out clean as efficient and stress-free as possible.
Table of Contents
ToggleKitchen Cleaning Checklist
When it’s time to move out, the kitchen often requires the most attention due to the accumulation of grease, food residue, and general usage. Here’s how to leave your kitchen spotless:
Clear Out Cabinets
Empty all cabinets and shelves. Check corners for crumbs or spills.
Wipe down inside surfaces with a gentle cleaner, focusing on sticky or stained areas.
Deep Clean Appliances
Oven: Use a commercial oven cleaner for the interior, and scrub racks separately.
Refrigerator: Defrost, if necessary, and wash all shelves and drawers with soapy water.
Microwave: Clean inside with a mixture of water and vinegar to remove food splatters.
Sanitise Surfaces
Clean countertops with disinfectant, remembering to lift items like toasters to clean underneath.
Scrub the sink with a baking soda paste and follow up with white vinegar for a natural shine.
Focus on Floors and Fixtures
Floors: Sweep and mop, paying extra attention to the spaces under appliances.
Fixtures: Polish faucets and handles with a microfiber cloth and appropriate cleaner.
Remember, estate agents and landlords scrutinize the kitchen closely, so ensure every surface shines and all appliances operate as they should. This level of detail will significantly increase your chance of getting your full deposit back.
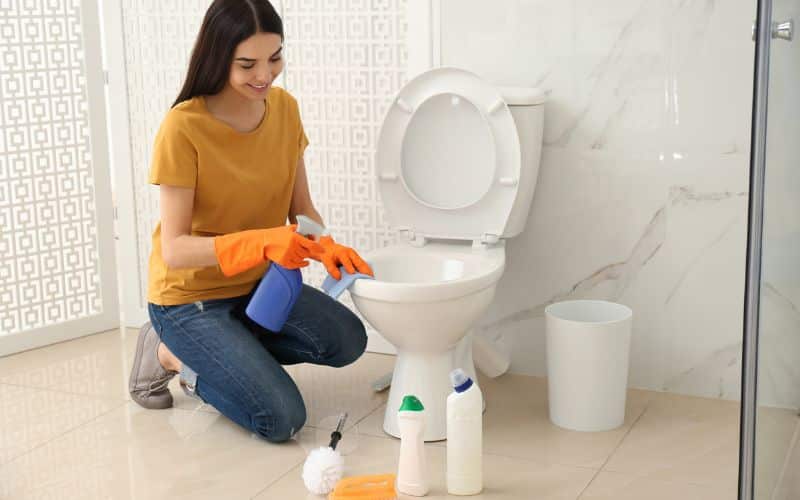
Bathroom Cleaning Checklist
Continuing with your moving out cleaning list, the bathroom demands special attention due to high moisture levels and bacteria presence. Make sure every corner shines, leaving no trace behind.
Start with the Toilet
Your first stop is often the biggest concern. Ensure that you:
Disinfect the entire toilet, including the bowl, seat, lid, and tank
Scrub with a brush and a reliable toilet cleaner
Wipe external surfaces with a disinfectant
Tackle the Shower and Bathtub
Lime scale and soap scum can be stubborn.
Use a specialized bathroom cleaner for tiles and glass
Clean showerheads and faucets by soaking them in vinegar
Attend to the drain and remove any hair or blockage
Sanitize the Sink and Countertops
A mix of frequent use and standing water calls for diligent care.
Wipe down with antibacterial spray
Shine the faucets and handles
Rinse thoroughly to avoid residue
Mirrors and Chrome Fixtures
Streaks are your enemy here.
Use a glass cleaner for a streak-free finish
Buff with a microfiber cloth to eliminate fingerprints and water spots
Floors and Walls
Finally, floors and walls need your attention.
Sweep and mop the floor, paying attention to corners and baseboards
Wipe down the walls with a damp cloth
Replace any used towels with fresh ones if required by your rental agreement
Don’t forget to check your extractor fan for dust and ensure it’s free of debris. This room is critical for hygiene, so ensure it’s in top-notch condition for the next occupant. Next, you’ll want to turn your attention to the living areas where meticulous detailing can make all the difference.
Bedroom Cleaning Checklist
When prepping for your move, giving the bedroom a thorough clean is key. Bedrooms are your sanctuary and ensuring they’re left pristine is both courteous and potentially required, especially if you’re looking to get a security deposit back.
Dust and Wipe Down Surfaces
Start by dusting every surface. Bedroom furniture such as bedside tables, dressers, and headboards can accumulate a surprising amount of dust. Use a microfiber cloth to effectively trap particles. Don’t forget to clean the lampshades and light fixtures.
Vacuum the Carpet
If you have carpeting, vacuum thoroughly, making sure to reach under the bed and other furniture. For hardwood floors, sweeping followed by mopping will ensure they shine. Pay attention to corners and skirting boards where dust bunnies tend to hide.
Clean Windows and Treatments
Your next step is to tackle the windows. Clean both the glass and frames. If you have curtains, check the washing instructions; some may be machine washable, while others may require more delicate handling.
Refresh the Closet
Empty the closet completely, wipe down shelves and rods, and vacuum the floor inside. If there’s a musty smell, a quick wipe with a vinegar-water solution can help neutralize odors.
Spot Clean Walls and Doors
Look for scuffs or marks on walls and doors; a magic eraser can work wonders on these. For more stubborn spots, a mixture of warm water and mild detergent should do the trick.
By following this checklist, you ensure that the bedroom is left in a state that’s as welcoming and clean as it was when you first moved in. Remember to also remove all personal items and debris, leaving the space ready for the next occupant.
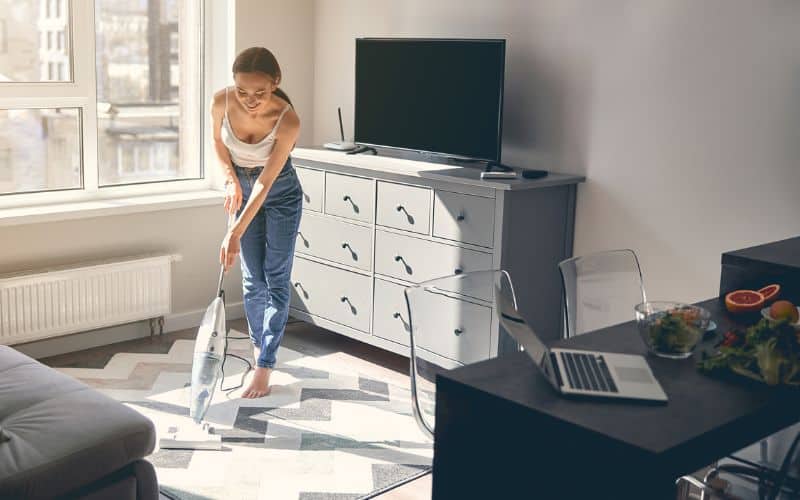
Living Room Cleaning Checklist
Transform your living room into a pristine space as you prepare to move out with this effective cleaning checklist. Remember, a clean living room leaves a lasting impression.
Dust and Clean Surfaces
Begin by dusting all surfaces, including coffee tables, shelves, and entertainment units. Wipe them down with a damp cloth to remove any lingering dust particles.
Upholstery Care
Vacuum sofas and chairs thoroughly using upholstery attachments.
Treat any stains on the upholstery using a suitable stain remover.
Spot Clean Walls and Light Fixtures
Check for scuffs or marks on the walls and clean them gently. Dust and wipe light fixtures to ensure they gleam.
Floor Treatment
First, vacuum the carpet or mop hard floors to eliminate any dust and debris.
Second, for carpets, consider steam cleaning to tackle deep-set dirt.
Window Washing
Clean the windows inside out, guaranteeing they sparkle and let in ample natural light. Don’t forget to dust off the blinds or wash the curtains, if applicable.
By following these steps, your living room will showcase a welcoming and tidy ambiance, perfect for the next occupants. Keep in mind the details, like baseboards and corners, which often go unnoticed yet contribute significantly to the overall cleanliness.
Miscellaneous Cleaning Checklist
When you’re moving out, attention to detail is crucial, and the miscellaneous areas in your home should not be overlooked. This checklist ensures every nook and cranny gets the attention it deserves.
Dust and Wipe Baseboards and Crown Moulding
Even if you regularly clean your floors and ceilings, baseboards and crown mouldings can accumulate dust and scuffs over time.
Wipe down all baseboards using a damp cloth.
Inspect the corners where cobwebs form and sweep these areas thoroughly.
Clean Air Vents and Replace Filters
Proper ventilation is integral for a healthy living space.
Remove and wash vent covers with soapy water.
Replace any old filters to improve air quality for the next occupants.
Wash or Replace Lightbulbs and Fixtures
A well-lit space looks cleaner and more inviting.
Dust off lightbulbs to provide better brightness.
Clean fixtures to remove dust and bugs that might have settled in them.
Tackle the Less Obvious Spots
Your checkout inspection will likely be rigorous; ensure minor areas are clean:
Inside closets, shelves, and drawers—vacuum and wipe them to remove dust and debris.
Behind appliances—if possible, move them carefully and clean the spaces behind.
Touch-up paint on areas that have been marked or scuffed over time.
As you work through these tasks, remember that leaving your property in pristine condition can help to secure your deposit return and serve as a courtesy to the incoming residents.
Conclusion
Armed with your comprehensive cleaning checklist, you’re now ready to tackle every nook and cranny of your soon-to-be former home. Remember, it’s not just about getting your deposit back—it’s also about leaving a space that’s welcoming for the next occupants. Your attention to detail will reflect well on you and ensure a smooth transition. So roll up your sleeves one last time, give your old home the farewell clean it deserves, and step confidently into your new beginning.
